
Adding a phone number to your Shopify store builds trust with potential customers.
When shoppers see a real phone number, they feel more confident making a purchase, especially if they have never bought from you before.
A visible contact number also improves customer support accessibility and can increase conversion rates.
In some regions, displaying business contact information is actually a legal requirement for online stores.
This guide covers five different methods to add your phone number to Shopify.
Whether you want it in your footer, header, contact page, or customer registration form, you will find step-by-step instructions below.
Editor’s note: Want to hear some sample support calls made for your Shopify store?
- Just paste your store URL
- Get sample calls in under 20 seconds (no email required)
- Listen to demo calls for my store
Quick comparison: 5 methods to add your phone number
Before diving into each method, here is a quick overview to help you choose the right approach for your store.
| Method | Difficulty | Time | Best For |
|---|---|---|---|
| Footer phone number | Easy | 5 min | Most stores (Social proof & Trust) |
| Header/Navigation | Easy | 5 min | High-visibility placement / Sales hotlines |
| Contact page | Easy | 10 min | Dedicated support page with context |
| Account settings | Very Easy | 2 min | Internal admin use & Order notifications |
| Registration form | Hard | 30+ min | Collecting customer data for SMS/Marketing |
Most store owners only need methods 1 through 3. Method 5 requires third-party apps because Shopify does not natively support saving phone numbers from registration forms to customer records.
Method 1: Add a clickable phone number to your Shopify footer
The footer is the most common place to display your phone number. It appears on every page of your store and visitors expect to find contact information there.
Step 1: Open the theme editor
From your Shopify admin, go to Online Store and then Themes.
Click the Customize button next to your current theme to open the theme editor.
The theme editor lets you visually edit your store layout without touching any code.
Step 2: Select the footer section
In the left sidebar of the theme editor, scroll down until you see the Footer section. Click on it to expand the footer settings and see all available blocks.
Step 3: Add a text block with your phone number
Click "Add block" within the footer section and select "Text" from the options. Type your phone number into the text field that appears.
You can add a label like "Call us:" before the number to make it clear what the number is for.
Step 4: Make the phone number clickable
Highlight your phone number text, then click the link icon in the toolbar. In the link field, enter the number using the tel: format.
Use only numbers with the country code. Do not include dashes, spaces, or parentheses.
Correct format: tel:+14165572870
Wrong format: tel:(416) 557-2870
If you see a "Link needs to be a URL address" error, remove all special characters from the phone number. This is the most common issue people run into.
Step 5: Save and test
Click Save in the top right corner of the theme editor. Then grab your phone and visit your store to test that the number triggers a call when tapped.
Note that tel: links only work on devices configured to make calls. On a desktop computer without calling capability, clicking the link may open a default calling app or do nothing.
Method 2: Add a phone number to your Shopify header or navigation
For stores that want maximum visibility, placing your phone number in the header or main navigation menu keeps it visible without scrolling.
Using the navigation menu
Go to Online Store, then Navigation from your Shopify admin. Click on your Main menu (or whatever menu appears in your header).
Click "Add menu item" and give it a name like "Call Us" or simply enter your formatted phone number.
In the link field, enter your phone number using the tel: format with country code and no special characters.
Click Add, then Save menu. Your phone number now appears in your site navigation.
Adding to the announcement bar
Some themes include an announcement bar at the top of the page. You can use this for your phone number if your theme supports it.
Go to Themes, then Customize. Click on the Header section and look for "Announcement bar" settings.
Enter your phone number and use the link tool to add a tel: link.
Not all themes have this feature. If you do not see an announcement bar option, your theme may not support it without custom code.
Method 3: Add a phone number to your Shopify contact page
A dedicated contact page is where many customers look for support information.
Adding your phone number here makes sense alongside your contact form.
Create or edit your contact page
Go to Online Store, then Pages from your Shopify admin. Click "Add page" to create a new contact page, or click on an existing one to edit it.
Give the page a clear title like "Contact Us" and add your phone number in the Content section.
Apply the contact template
Under "Theme template" on the right side of the page editor, select "contact" from the dropdown menu.
This adds Shopify's built-in contact form below your content.
If you do not see the contact template option, your theme may use a different naming convention. Check your theme documentation.
Make your phone number clickable
In the content editor, you can use HTML to create a cleaner clickable link. Switch to the HTML view and add:
<p>Call us: <a href="tel:+14165572870">+1 (416) 557-2870</a></p>
This displays the formatted number for readability while keeping it clickable. You can format the display number however you like, but the tel: link must use numbers only.
Add to your store menu
After creating your contact page, remember to add it to your navigation menu so customers can find it.
Go to Navigation and add a menu item linking to your new contact page.
Method 4: Add a phone number to your Shopify account settings
This method adds a phone number to your personal admin account, not your storefront.
It is useful for account security and receiving Shopify communications.
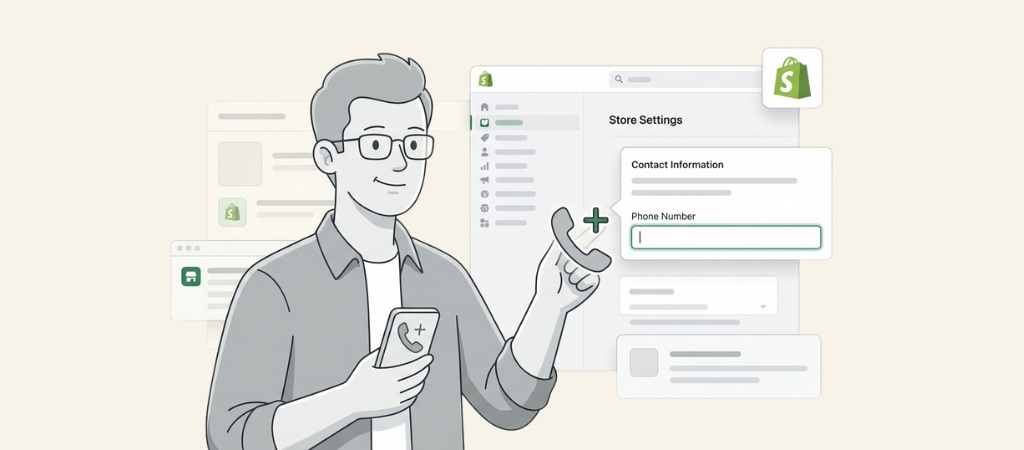
How to update your account phone number
From your Shopify admin, click your store name in the top bar.
Then click your profile name to open your account settings.
In the Details section, click "Add" or "Update" next to the phone number field.
Select your country code and enter your number, then save your changes.
This phone number does not appear anywhere on your store. Customers cannot see it.
It is only used for your Shopify account management and two-factor authentication.
Method 5: Add a phone number field to your customer registration form
This is the most complex method. Use it when you need to collect phone numbers from customers during account signup. Be aware that this requires third-party apps.
Why Shopify does not support this natively
Shopify's built-in registration form does not save phone numbers to the customer's contact info field. Even if you manually add a phone input field using custom code, the data will not be stored properly in customer records.
Several Shopify community threads confirm this limitation. The phone number may display in a form, but it goes nowhere when submitted.
Solution: Use a form builder app
Third-party apps properly handle phone number collection during registration. Here are two solid options.
Helium Customer Fields is the most recommended solution. It has a 4.6/5 rating from 253 reviews and includes a 14-day free trial.
| Plan | Price | Key Features |
|---|---|---|
| Lite | $12/month | Phone field, email verification, 2 forms, up to 5,000 customers |
| Pro | $26/month | Auto-tagging, form logic, 5 forms, up to 10,000 customers |
| Advanced | $60/month | REST API access, priority support, unlimited forms, up to 50,000 customers |
Helium stores phone numbers directly to Shopify's customer contact field, making them searchable and visible in your admin.
If you specifically want phone verification via SMS, OTP Login with Phone is an affordable alternative at $4.99/month with a 3-day free trial.
It lets customers register and log in using only their phone number and an OTP code sent via SMS.
Note that SMS verification apps require a separate SMS provider like Twilio, which adds monthly costs beyond the app subscription.
Basic setup steps with apps
The general process for most form builder apps follows these steps:
- Install your chosen form builder from the Shopify App Store
- Create a custom registration form within the app
- Add a phone number field (type: tel)
- Configure where the data is stored (customer record)
- Replace the default registration with your custom form
- Test the registration flow end to end
Each app has its own setup process. Follow the app documentation for specific instructions since interfaces differ.
Common errors and how to add phone number to Shopify store without issues
Even simple tasks can hit snags. Here are the most common problems and their fixes.
"Link needs to be a URL address" error
This happens when your phone number contains special characters or the tel: format is wrong.
Remove all dashes, spaces, and parentheses. Use only digits with the country code.
Wrong: tel:(416) 557-2870
Correct: tel:+14165572870
Phone number does not work when clicked
Three things commonly cause this. First, check if you included the country code. Always add it, like +1 for US and Canada.
Second, remember that tel: links only work on devices with calling capability.
Testing on a desktop computer without a calling app will not trigger anything.
Third, double-check for typos in your number. One wrong digit breaks everything.
Phone number not appearing on store
If your changes are not showing up, verify that you clicked Save after making edits.
Then check if the section or block is set to visible in your theme settings.
Try clearing your browser cache or doing a hard refresh with Ctrl+F5. Theme changes sometimes take a moment to propagate.
Phone from registration not showing in customer info
If you added a phone field manually without an app, the data will not save to customer records. This is a Shopify limitation.
You need a third-party form builder app like Helium Customer Fields that properly integrates with Shopify's customer API.
Best practices for displaying phone numbers on Shopify
Getting the phone number on your site is just the first step. How you display it matters too.
Mobile UX considerations
Always use tel: links so mobile users can tap to call. Position phone numbers where mobile users can easily tap them without accidentally hitting other elements.
Consider adding a phone icon next to the number for visual recognition. Some themes include icon options, or you can use custom HTML.
International formatting
Include your country code for international customers. Display the formatted number for human readability, like +1 (416) 557-2870.
But use the clean format in the tel: link without any special characters.
If you serve multiple regions, consider listing multiple numbers or noting which countries you can accept calls from.
Where to show your phone number
Footer placement works for most stores because visitors expect contact info there. Header placement makes sense for service businesses where phone calls drive revenue.
Contact pages are standard locations that customers know to check. For high-consideration purchases, consider adding your phone number to product pages as well.
Ringly.io: AI phone support for Shopify brands
Ringly is AI phone support for Shopify brands. The phone shouldn't be a tax on your support team. Instead of growing your support headcount every time call volume goes up, the AI takes the routine inbound calls so your team can focus on the work that actually moves revenue.
The AI answers inbound calls 24/7. It finds orders in your Shopify store, processes returns and exchanges, answers product questions from your knowledge base, and rescues abandoned carts via outbound follow-up. Across 50+ brands, the AI resolves 73% of calls autonomously at roughly $0.42 per resolved call. Calls that need a human escalate cleanly to Gorgias, Richpanel, Reamaze, or whatever helpdesk you already run.
Plans: Grow $349/mo (1,000 minutes), Pro $799/mo (2,500 minutes), Enterprise custom. 14-day free trial on Pro. Live in under an hour. 65% resolution guarantee: if the AI resolves under 65% of your calls in 90 days, we refund the last 3 months.
How do I add a phone number to my Shopify store footer?
Go to Online Store, then Themes, then Customize. Click on the Footer section, add a Text block, enter your phone number, and use the link tool to create a tel: link with your number in digits only.
What format should I use when adding a phone number to my Shopify store?
Use the tel: protocol with only numbers and the country code. For example, tel:+14165572870 is correct. Do not include spaces, dashes, or parentheses in the link itself.
Can I add a phone number to my Shopify store header?
Yes. Go to Online Store, then Navigation. Edit your main menu and add a menu item with your phone number. Enter a tel: link in the link field.
Why is my phone number not saving when customers register on my Shopify store?
Shopify's native registration form does not save phone numbers to customer records. You need a third-party app like Helium Customer Fields to properly collect and store phone data during signup.
How do I make a phone number clickable when I add it to my Shopify store?
Highlight the phone number text, click the link icon, and enter tel: followed by your number with country code and no special characters. Example: tel:+14165572870
What apps can I use to add a phone number field to my Shopify store registration?
Helium Customer Fields ($12/month, 14-day free trial) and OTP Login with Phone ($4.99/month, 3-day free trial) both support phone number collection during customer registration.
Can I add a phone number to my Shopify store contact page?
Yes. Create or edit a page, add your phone number to the content area, select the contact template, and optionally make the number clickable using HTML or the link tool.